Best Las Vegas Mortgage

A Guide To Mortgage Loans In Last Vegas

Plastic Injection Mold Solutions for Every Industry

Plastic injection molding is one of the most convenient methods to fabricate finished plastic material parts. This process requires an injection machine, raw plastic material and a mold (usually machined from aluminum or steel) that holds the melted plastic until it cools and solidifies into the final product.

Plastic Injection Mold

Once a design is ready, professional machinists make the tooling mold. The quality of this mold has a significant impact on the finish and dimensional tolerances of your parts. Read on Plastic Injection Mold Service Florida for more information.

The choice of materials used in injection molding can have a significant impact on cost, performance and aesthetics. The best injection molding company will have the knowledge and experience to help determine the correct material for your product. Different materials offer unique properties that can improve the overall quality and reliability of your final product.

Plastic resin comes in small pellets and is heated to a liquid state before being injected into the mold cavity. This process is a fast and economical way to produce large volumes of molded products. The type of plastic selected will directly affect the finish and dimensional tolerances of the finished parts.

Polyethylene, or PE, is one of the most common injection molding materials and offers a great balance of flexibility, durability, and cost. This versatile plastic is found in everything from milk jugs to car batteries. It can withstand high temperatures and is easily recycled. Polypropylene, or PP, is another popular plastic for injection molding that has high strength and elasticity and resists moisture and bacterial growth. It is easy to work with and can be molded into live hinges.

Acrylonitrile butadiene styrene, or PMMA, is also a popular injection molding material. It has a high transparency and gloss with good abrasion resistance. It can withstand a variety of chemicals, including some acids and bases. It is a good choice for cases for computers and laptops.

Adding threaded metal inserts can increase the strength and structural integrity of injection molded products. This can add stability and allow for screw or bolt connections. The insertion of these threaded components is usually done during the injection molding process, and can be completed with precision.

Another option for injection molding is to use a vacuum forming technique, which can be used to create hollow parts. This method can also be used to create curved or angled surfaces. This is often referred to as a “two-shot” injection molding process and provides greater versatility for the finished product.

Injection molding is a great option for producing prototypes and end-use production parts because of its low operating costs and high-quality products. The injection molding process uses automated equipment and robotics to reduce labor costs, resulting in lower production costs for each part. Injection molding can also save you money on assembly and finishing because the products are typically produced in the finished state, eliminating the need for additional steps like painting or machining.

Design

A quality plastic injection molding manufacturer is able to produce products with tight tolerances. This is made possible by using high-quality materials, sophisticated design software and rigorous inspection quality programs. The engineering phase involves developing a detailed injection mold from a sample part or drawing. The complex designs format the tooling that shapes the injection mold for the product. The injection mold must be able to hold composure under the injection pressure process for thousands of cycles without degrading or leaking.

The most significant cost driver in injection molding is the cost of the tooling. Injection molding tooling costs are fixed, irrespective of the number of parts manufactured. Hence, any changes to the mold design should be done with an eye on reducing the overall cost of the injection molded part.

Injection molding services include the injection of molten plastic into a mold cavity and the cooling of the molded product to maintain its shape. Injection molding can be used for the production of a wide range of consumer and industrial products.

During the design process, Abtec engineers will look at the dimensional criteria for the finished product and will ensure that the mold will meet these specifications. They will also consider factors such as cavitation, mold construction and tie bar distance during the overview process.

A key consideration is the location of the parting line, which is where two halves of the mold come together. A well-positioned parting line can help reduce secondary machining and improve the integrity of the resulting injected product. Abtec engineers will look at the parting line in terms of both the line of draw and the positioning of the core and inserts.

Another factor is the length of time the molded product takes to cool down and solidify to its final form. This cooling stage is a critical component of the molded product and should be taken into account during the design stage. Injection molded parts with undercuts may require a shut-off to eliminate the undercut.

Other design features to be considered for an injection molded product include the inclusion of fasteners, such as screws or bolts. These can be added to the product by designing a thread directly on the surface of the plastic, by using a side action core or by including a threaded insert. It’s important to note that when adding fasteners to a plastic injection molded product, the tolerance must be limited to +/- 0.250 mm (0.010″).

Tooling

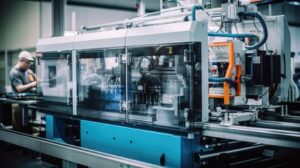
Injection molding is a high-tech process that involves a sophisticated machine called an injection mold. The injection mold shapes the plastic into the final product using intense, controlled pressure. To maintain precision and accuracy, this machine requires sophisticated tools. Modern tooling includes computer-aided design (CAD) and manufacturing software, advanced materials, and innovative techniques. These technologies allow manufacturers to produce highly complex products with tight tolerances and superior surface quality.

The injection molding machine and its tooling are the heart of the entire plastic injection molding process. The equipment must be of the highest quality and capable of enduring rigorous use over thousands of injections. That’s why we use a comprehensive inspection process to ensure the safety and reliability of all our machines.

To guarantee the quality of your injection molded products, our engineers take your specific production needs into account from the outset of the project. We also understand the restrictions and possibilities of the injection molding process, so we can design your parts with a clear understanding of your production goals. This helps us deliver a high-quality product with a competitive cost.

The choice of materials for the mold and the injected plastic is another critical aspect in the success of an injection molding project. Different thermoplastics have varying flow and shrink rates, which must be taken into account during the design phase to avoid issues like warping or sticking. To ensure the durability and longevity of your plastic injection molds, we utilize high-quality steels and other materials that can withstand harsh conditions and repeated use.

Depending on your project’s volume requirements, we can optimize the number of cavities in your plastic injection mold to reduce upfront costs and speed up production time. We can also use angular slides and lifters to create recessed features in your plastic injection molds, increasing the versatility of your finished product. We have years of experience in molding complex, heavily filled Engineered Thermoplastics and can assist with material selection during the part design phase.

If you need to transfer your injection molds from one injection molding service provider to another, we offer swift and responsive tool transfer services. Our team is ready to handle the evaluation and documentation required for a successful move, so you can be confident that your plastic injection molding tools will be in good condition when they arrive at the new facility.

Production

Injection molding is an automated procedure that reduces human error and saves on supervision costs. The process is also streamlined with the help of self-gating technology, which simplifies operations and manufacturing while decreasing the chance for human error. The resulting plastic parts are very affordable to produce, especially with the high volume that can be produced at one time using this method.

Depending on the size and complexity of a part, production can be as quick as 24 hours from start to finish. Once a prototype is approved by the customer, it can be sent into the injection mold machine to create thousands or millions of optimally processed and finished plastic material parts. Once the tooling and prototype is finished, a series of tests are performed to ensure the molded product meets all specifications. This is when the final product really begins to come to life.

In the electronics industry, injection molded parts are used to make circuit boards, switches and support for completed systems. They can be made from conductive or non-conductive plastics, paired with waterproof seals and UV resistant coatings to meet specific product requirements for both durability and aesthetics. This is where the versatility of plastic really shines, as it can be molded into many different shapes and sizes without losing any structural integrity.

With plastic injection molding, there are many options to choose from for surface finishes as well. Some plastics have natural smooth surfaces, while others may need a special treatment to enhance appearance and provide traction for a particular application. Oftentimes, color is a consideration as well. Plastic is extremely versatile in this regard as it can be molded into various compounds and colors, including clear to cyan and everything in between.

Injection molding is a highly repeatable and consistent process, which is important for industries like automotive and medical devices where minor deviations can have severe consequences. Injection molding can achieve tolerances of +/-.0005 inches, which is far tighter than the tolerances possible with CNC machining. Injection molding is also a very efficient and environmentally responsible process. Unlike other manufacturing processes, plastic injection molding does not require heating or melting of raw materials. This allows for the use of recycled and reprocessed materials, helping to minimize environmental impact.

Garage Door Repair Starts With a Good Plan

As with any type of repair, garage door repair starts with a good plan. This helps you avoid surprises during the repair process and gives you confidence that your repairs will succeed.

Garage Door

Taking a step back, examine the vertical part of your garage door metal tracks for crimps, bends and dents. Serious dents can often be repaired with a track anvil, which is a specialty tool.

Rollers are small wheels that help your garage door move along the tracks, making it easier to open and close. However, they can become damaged over time. Luckily, there are several ways to repair them and improve their performance.

One common cause of damage is poor lubrication. This can lead to a number of problems, including a loud, shaking door and rubbing noises. It can also cause the rollers to stick or fall off of the track. In addition, if the garage door is too heavy, it can put extra strain on the rollers and cause them to wear out faster.

A broken roller can also affect the performance of other parts of your garage door. If you have a wooden garage door, for example, the metal rollers may create rust and scratch the tracks. This can make the entire door unsafe to use.

Other causes of damage to the rollers include fatigue spalling, which is caused by oxides and other hard inclusions in the steel. It results in a pitted surface and microcracks, as shown in Figure 8a. Another type of damage is point surface spalling, which is caused by a raised surface that exceeds the thickness of the bearing lubrication film.

It’s important to check the condition of your garage door and its components regularly to identify any potential issues before they become serious problems. These problems can be costly and dangerous to fix. By following these tips, you can keep your garage door in good condition and ensure that it’s working properly. If you do encounter any issues, be sure to contact a professional garage door service for help. The professionals at American Garage Door and Repair Services can realign the tracks, repair damaged panels, tighten loose screws, lubricate the rollers, and align the electronic sensors.

Damaged Tracks

The metal tracks that guide a garage door’s movement can suffer damage, misalignment, or other issues that affect the function and safety of your system. Regular maintenance and inspections, including lubrication, are the best way to extend their lifespan.

It is possible to fix minor damages like a cracked hinge or fading paint on your door, but any damage to the tracks requires a professional’s help. Those repairs may be more expensive, but they are worth it to ensure that your garage door is safe and operates properly for years to come.

Garage doors are heavy, and they need sturdy, well-installed tracks to be able to support them and move with ease. If your tracks are bent or damaged, they will not be able to support the weight of the door and may even become detached from the mounting hardware. This can result in a dangerous situation where your garage door could fall and damage your car, or worse, hurt anyone inside or outside the garage.

Damaged tracks can occur in many ways, including impact from vehicles, accidents, or simply age and use. Even a small bump or jolt can cause them to bend or shift out of alignment. Tracks can also be damaged by misjudgment when backing a vehicle into the garage door, or from items that get caught up in the mechanism while it is moving.

In some cases, the most effective solution for tracking problems is to replace them altogether. A repair technician can provide this service and make sure the new track is properly installed and aligned to ensure that your garage door moves smoothly for years to come. They can also ensure that the mounting hardware is secure and tight, and that the track rollers are not causing abrasion on the garage floor.

Broken Hinges

Although they may seem simple at first glance, hinges are one of the most important parts of your garage door. They take a lot of strain from everyday use, so they can break down or become damaged over time. Unfortunately, this can affect the whole door and cause further problems. Fortunately, most issues with broken hinges can be fixed with a few easy steps.

If you notice that your garage door is making strange noises when opening or closing, it could be a sign that the hinges are starting to wear out. The noises are usually caused by metal rubbing against each other, which can be resolved by lubricating the hinges. The lubricant will help to reduce friction and will restore the door to its normal operation.

It’s also a good idea to check the hinges regularly to make sure they are tight and secure. If you find any loose screws or enlarged screw holes, you can easily fix this by using carpenter’s glue or wood filler. Just make sure to let the glue dry before attempting to use the door again.

Another possible problem with broken hinges is that they may start to bend or deform. This can be caused by repeated stress or simply from ageing. If this happens, it’s a good idea to replace them with stronger hinges. You can purchase new hinges from most home improvement stores or hardware suppliers. Just make sure that you choose strong, heavy-duty hinges that are designed for the weight of your garage door.

If your garage door won’t open or close properly, it can be a huge inconvenience and leave your belongings vulnerable to theft and weather elements. However, most of these issues can be solved by following a few easy steps and implementing some basic maintenance routines.

Broken Spring

The springs are one of the most important parts of a garage door, as they balance the weight of the door while it moves. So, when they break, it can severely impact the operation of your entire system. The easiest way to know if you have a broken spring is when you pull the opener cord, and the door either doesn’t open or rises at an erratic pace.

Another sign is when you try to raise the door and it feels like there’s more resistance than usual. This is because the weight shifts unevenly. You may also notice that the door falls faster than it usually does.

You’ll often hear a loud popping sound when your torsion or extension spring breaks. This is because the spring is under tension, and the released tension has to go somewhere. This could be your car, a nearby wall, or even a storage rack.

A broken spring can be dangerous to try to handle on your own. You should always call a professional garage door repair technician, who has the experience and tools to properly replace your broken spring.

Before you begin, make sure to disconnect the opener by pulling the emergency release cord (usually red). This will disable the motor and allow you to lift the door manually. It’s also a good idea to get help when lifting the door, as it will be extremely heavy without the support of the springs. You’ll need to have a few tools on hand, including two C-clamps, box wrenches, a stepladder, and a bathroom scale. Once you’ve removed the old springs, be sure to purchase double-life springs (they’re stronger and last longer). Then, follow the manufacturer’s instructions for installing your new ones.

Dirty Sensors

Sensors play a vital role in ensuring that your garage door’s mechanisms operate safely. Over time, however, they can develop issues that affect their performance. One of the most common issues is a dirty sensor lens.

Sensor lenses are very small and can easily become clogged with dirt, dust, paint, bugs, or other debris. These obstructions can prevent the sensors from sending and receiving the infrared light signals that are needed for detecting objects. You should clean your garage door sensors regularly to ensure optimal functionality. Simply wipe the lens with a soft cloth and mild cleaner that won’t leave streaks.

The sensors also need to be properly aligned in order to work correctly. If the green lights are not glowing, you should check the alignment of each sensor and move them slightly to realign them. You can also use a laser level to help you line up the sensors.

If the green lights are still not glowing, you may need to replace your sensor’s photo eyes. Over time, the photo eyes can become misaligned and this will cause the sensor light to begin blinking. In this case, you will need to contact a professional for assistance in replacing your sensors.

It is also possible that the wires connected to the sensors are pinched. This can occur over time due to wear and tear, pest infestations, and weather conditions. If this is the case, you will need to contact a garage door repair company for professional help in replacing your sensors. They will be able to identify the problem and fix it quickly and effectively. They will also be able to advise you on any other issues that you may need to address in order to get your garage door working again.

DIY Insulation – Tips And Tricks For Homeowners

Insulation Removal Perth and installation is an important home improvement that can help reduce energy expenses and provide a more comfortable living space. However, insulation upgrades can be time-consuming projects for DIY homeowners to complete.

It’s crucial to understand the necessary equipment, safety precautions, and proper handling techniques before undertaking a DIY home insulation project.

insulation

Know Your Materials

With dramatic increases in energy costs, the escalating climate crisis, and concern for a sustainable future, insulating your home has never been more important. It can cut your energy bills, reduce your impact on the environment, and make your home more comfortable year-round.

Fortunately, there are many DIY insulation options available for homeowners looking to save money on utility bills and make their homes more energy-efficient. Depending on the project, some types of DIY insulation require wall removal while others—such as spray foam or blown-in fiberglass or cellulose—can be added without changing the structure of the home.

The cheapest option for insulating walls is blanket batts and rolls, which are typically constructed with fiberglass but also come in versions made with mineral wool, plastic fibers, or even sheep’s wool. They are designed to fit into the standard width between wall studs, attic rafters, and floor joists. This type of DIY insulation can be installed in attics, basements, and unfinished walls with minimal wall repair.

A common choice for insulating ceilings is expanded polystyrene foam (EPS) or a similar product that has a high R-value per inch of thickness and is moisture resistant. It is a popular DIY insulation option for attics, unfinished ceilings, and foundation walls.

Insulating crawl spaces is another popular and effective DIY insulation project. Crawl space insulating materials range from a simple layer of rolled batting to rigid foam boards. Depending on the size of the crawl space, you may be able to do this insulation project yourself or you might need to hire a professional.

Adding a door snake to your front or back doors can prevent cold air from entering and hot air from escaping your home. It’s easy to make, too: simply measure the width of your door, sew two pieces of fabric together with a layer of foam in between, and slide the piece beneath your door.

Know Your Tools

Installing insulation is not only a DIY-friendly project, but it can also save you money on energy costs this winter. With energy bills skyrocketing, it’s important to make your home as energy-efficient as possible. The following tips and tricks will help you keep the heat in and the brisk air out.

When choosing the type of insulation to install in your home, it’s important to consider the R-value. The higher the R-value, the better insulative power the material has. While many homeowners use blanket insulation or foam board for their projects, those looking to reduce their carbon footprint may want to consider cellulose or wool insulation made from recycled materials.

If you’re planning to do a larger insulation project, such as attic insulating, you’ll need several tools to get the job done right. For instance, a utility knife and measuring tape are essential for cutting the insulation to the correct size. It’s also a good idea to wear safety gear, such as thick gloves and protective goggles when working with insulation.

Adding an insulation jacket to your water heater is another low-cost DIY project that can significantly cut down on energy loss. This insulation wrap helps keep the water in the tank warmer, meaning you’ll need to run the water heater less often.

Lastly, you can reduce drafts from windows and doors by installing new weather stripping and door sweeps. Additionally, you can reduce energy loss from light switches and outlets by spraying low-expanding foam behind the box. This will prevent hot or cold air from escaping through the electrical cords. You can even use a can of foam to seal the gap between drywall and a wall to make your home more energy-efficient.

Know Your Safety Precautions

Insulation isn’t something that you can easily show off to your friends on Instagram, but it is one of the most important parts of a home. Not only will it help you save on your energy bills, but it will also protect your home from drafts and other problems that can make living in your house less comfortable. If you are thinking about doing your insulation installation, there are some things that you need to consider before getting started.

First, you should do some research on the type of insulation that is best for your home, including R-values and compatibility with the structure of your home. You should also determine if any vapor retarders are required, and what kind of equipment is needed for installation. Once you have a good idea of the project’s scope, you can start by assessing the areas that need to be insulated and determining whether or not the job is doable as a DIY project.

Safety is a big concern for homeowners who are considering DIY insulation. Many different types of insulation are irritants to the skin and can be hazardous when inhaled, so DIYers need to take precautions. This can include wearing gloves, a mask or respirator, and protective eyewear to avoid irritation and exposure. It’s also important to know what the proper installation methods are for your specific insulation material, as this will minimize the risk of injury and ensure the job is done correctly.

Other safety concerns for DIYers include working around electrical wiring and ensuring that any existing insulation is removed properly to prevent fire hazards. Additionally, you should be aware of any structural issues that may exist in the attic or rim joists, as these can impact the efficiency and durability of your new insulation. If you’re concerned about these issues, it’s a good idea to hire a professional contractor.

Know Your Schedule

Having your house adequately insulated is an important home maintenance task. It reduces drafty areas, saves energy, and can lower your utility bills. Insulation works by trapping pockets of air to slow the transfer of heat into and out of a home in the winter and summer. Different insulation materials have differing R-values or thermal resistance ratings, and many require specific installation techniques. Homeowners may be tempted to take on DIY insulation projects, but this is not necessarily the best idea. Hiring a professional contractor is more cost-effective and ensures that the project goes smoothly without any safety or health issues.

A few simple, inexpensive items can help improve the insulation in your home. Installing new weather stripping and door sweeps can reduce the amount of cold air that leaks into a room through cracks in the frame and around the edges of doors and windows. Adding water pipe insulation can also be an affordable way to save money on utilities. It reduces heat loss and raises water temperatures faster so that it doesn’t run off the hot side of the pipes as quickly.

In a home, the roof is often one of the biggest sources of heat loss. Adding mineral wool or fiberglass insulation in the attic is an effective way to cut energy costs and make your home warmer in the winter and cooler in the summer.

When installing insulation, it is important to follow the manufacturer’s instructions on proper use and safety. Safety precautions include wearing a face mask or respirator, protective gloves, goggles, and a hat. When working in the attic, avoid walking on ceiling joists and always be careful when navigating ladders or stairs. It is also important to not compress or disturb existing insulation, as this can cause it to break down faster and decrease its effectiveness.

Know Your Limits

Insulation and air sealing are among the best investments in home energy efficiency. They improve comfort while lowering your energy costs, especially when combined with other energy-saving upgrades such as replacing furnaces and water heaters, reducing heating and cooling usage, and adding solar panels.

Home insulation works by trapping tiny pockets of air to slow the transfer of heat into or out of the home. This allows the homeowner to regulate their thermostat and save on energy costs. Different types of insulation have different R-values, which are rated by how well they resist heat flow. The higher the R-value, the better the insulation.

Regardless of the type, DIY insulation can be dangerous and requires a certain amount of skill to install properly. Some materials are irritants to the skin and can release toxic vapors if not handled correctly. It is also important to have the proper safety equipment when working with insulation. This includes goggles, a mask or respirator, and gloves. It is also a good idea to have a friend on hand to help with heavy lifting and maneuvering, especially when working in the attic.

If a professional insulation project isn’t in the cards for this fall, there are still plenty of simple, affordable DIY home insulation projects you can do. Start by searching for drafts around doors and windows. Seal any leaks with weather stripping and caulking to prevent cold outdoor air from leaking into the house. Insulate your water heater with pipe wrap to prevent freezing in frigid temperatures, and add a plastic insulation kit to the windows for an easy, inexpensive improvement. These simple projects can make your house more comfortable and help you save on energy prices for the rest of the season.